Hi! How are you?! Do you have a dress for Halloween trick or treat? Well, my doll is ready to go now for trick and treat! I bought this fabric 2017 at Walmart and planning to use this for Halloween costume. So that's it! Happy Halloween and crafting!!
Hi! Here's my first Filipiniana Dress for American Girl Doll. At last, I made the Filipiniana sleeves. The technique is FOLD, PIN and PRESS. Once you are done on FOLD and Pin, sew on to the sleeve. Then PRESS. I starts folding and pin on the center.
Welcome to my Under the Sea theme. I made happy birthday banner with Ariel on both ends and centerpiece. The banners are made of cardstocks, glitter and organza. I used Silhouette Studio Designer Edition to print and cut for Ariel, cut for shell shapes and Happy Birthday letters. Embossed the shell shapes and glue them. Happy birthday letters spray with Loctite Spray Adhesive repositional and glitter using Recollections Extra Fine Glitter Fairy Dust. The Ariel and sea horse are not my image. I google them. Import it in Silhouete Studio. Trace, print and cut. Same procedure in sea horse. The centerpiece starfish, Ariel, 5, shell, sea horse are glitter and layered too. I didn't attached stick on it because it was requested. Thank you my sweet customer
I just finish the school uniform for my doll. By the way, this is my school uniform when I was in elementary and high school in the Caloocan City, Philippines. This is my first adding buttons and pleats in skirts. I used my manual how to add buttons. It is so exciting adding buttons. For skirt, I remember how my Mamang does my skirt when I was young and YouTube.
I will upload the video later. See you! Happy crafting!!!
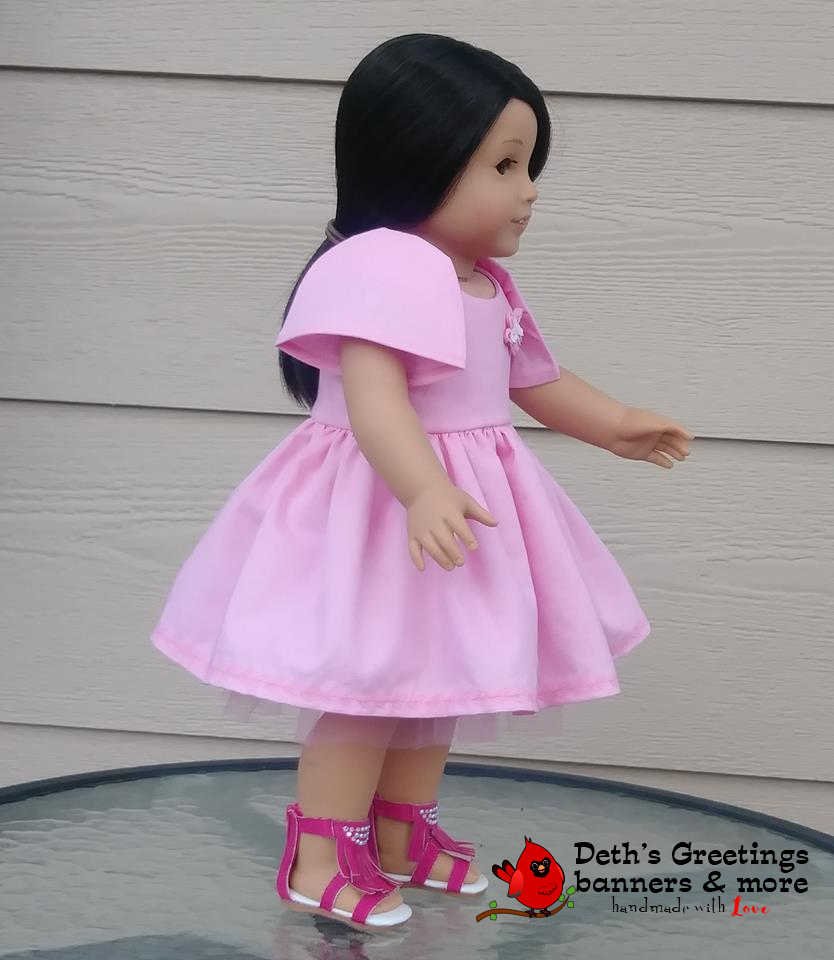
I
made a backless summer dress for my American Girl Truly Me #64 18”
doll. I called her as little Deth. Her cute dress was from the See
and Sew B6082 Bodice Front and Bodice Back and skirt patterns. I just
alter the bodice back for backless style. The color of the fabric was
really match for summer season plus the material too. It is Keepsake
Calico Cotton brand dots on yellow fabric. The bodice is lined.
Inside seams are finish. The dress opens in the back with snaps. Watch my video via Youtube how I do it!
I have new members haul sewing and craft tools! These are wonder clips, seam rippers and scissors. The seam rippers and scissors includes soft tape measure. The wonder clips has 15 big, 25 medium and 60 Small. For me, these are great for any size of sewing and craft projects. I tried it and I highly recommend for beginners who just beginning to buy their sewing tools. But please don't throw your pins because you may use that as well. Please watch my video via YouTube. Happy crafting!!!
Hi. I have new dress for my cute American girl doll Truly me 64. White T-shirt with denim mini skirt The
white t-shirt is from See and Sew B6082 Dress C pattern. I made
short sleeve rather long sleeve on the original pattern. And I
followed the rest pattern. The
denim mini skirt is from Liberty Lane pattern. In making the denim
mini skirt, I learned that I should follow the measurement of ¾”
on the elastic side. To have enough space when inserting the
elastic. For
denim fabric always remember to use the denim needle or at least
70/10 – 110/18. Tension is #8. The thread should denim also. For
crossbody messenger bag, I use my jewelry chain because the denim
fabric is thick to fold in small width. I follow the Sewspire
instructions on how to make a messenger bag. I hand sew the top edge of the bag. I use snap for closure.
Hi! I made an It's a boy baby shower banners. The card stocks are from All About Boys stacks with gloss DCWV and the solid card stocks are from Staples. It has cute buttons and I added stitches on the sleeves. If you like this banner please email or you can check my Etsy shop. For more pictures please visit my Facebook link. More pictures here at Facebook.
Thursday, June 28, 2018
Hi Magandang umaga! Welcome to my channel. What is your software to draw your floor plan? Watch my video on how I draw my floor plan plus shelves and counter via YouTube. In this video I am going to draw my craft room floor plan, simple wall shelves and counter table using Silhouette Studio Designer Edition V3. To draw shapes I use the following rectangle, round rectangle, an arc and polygon. Then I use weld command to come up to my desired shape. I use knife tool to cut edit shapes. I will print all my files after I finish drawing my plans.
This is the complete video on explosion card making Father's Day card. My husband already received his card on Father's day. Though the celebration is over I just want to share my first simple explosion card using Silhouette Studio Designer Edition for designing my card plus drawing my beer mug, a cap and the Father's Day sentiment.
Summer is coming so I plan to sew a sun dress for my American Girl cute doll. I have a pattern from See & Sew B6082. Then this pattern has for summer dress or sun dress. The top dress is Dress B Sundress while the inside is Dress C. I wanted to sew only the dress B but after I finish the dress the arm whole is kinda big that I can the inside of her body. So, I decided to sew the Dress C. The closure for Dress B is snaps while the Dress C is velcro.
This is my first explosion card making. It is simple yet my husband likes it so much. I use Silhouette Studio Designer Edition V3 and Cameo to design, print and cut all the images. The beer mug, cap and Happy Father's day sentiment clip arts that I posted on my previous was for this card.
Today is American Flag day so I decided
to have a live streaming via YouTube on how to draw an American flag in
Silhouette Studio Designer Edition V3. To draw shapes I use the
following Ellipse, Rectangle and Polygon. Then I use weld command to
come up to my desired shape. You will see also how I save this image
from PDF file to JPG file. So, please watch my YouTube video. Oh by the way, sorry for the first clips of my streaming. I am trying to edit it using YouTube. Thank you
Hi there! Another drawing I did using Silhouette Studio Designer Edition v3 and this is my first digital beer mug and cap clip art. I am making an explosion card and these clip arts will be added to my father's day card. It is for my husband. He likes beer and cap. I enjoy drawing this beer mug. The cap video will follow soon. So, please watch the YouTube video how I do it. Thank you and happy crafting.
How do you draw your image? What did you use? In this video I use Silhouette Studio Designer Edition V3 to draw a dress. It is a simple design that's why I use this program. Did you know by using ellipse, rectangle and most especially Polygon you can draw your desired shape. Good thing also that the Edit Points and the Weld command are there to draw an image. Editing Points helps me to curve the line while Weld commands helps me change or make a shape. Oh the Replicate commands helps a lot. It makes easier for me to finish the tasks. So please watch my video via YouTube on how I draw a dress.
Hi! Fellow Silhouette Studio users! Are you making card? How you put your trademark on your card? In this video I will show how to layout my trademarks, print and most
especially to cut the image or shape with text using Silhouette
Studio Designer Edition V3 and cut it using Silhouette Cameo WITHOUT using Registration Marks! So please watch my video how I do it!
Hello there! Remember my post of Sneak Preview on my Z Fold Mother's Day card? Here's now the complete video on how I made my Double Z fold card for Mother's Day!
I
have learned last weekend that the Z fold is different from Double Z
fold card. I read it from Beccy's Place blogger posts. Actually, this
is the first video that I filmed. So welcome to my Double Z Fold
Mother's Day card making.
In
this video I show the following:
>
Cutting the girl metal dies using the Bigkick and multipurpose
platform;
>
How I layout and cut the base using Silhouette Studio Designer
Edition V3 and Cameo 1.
>
Make, print and cut the Happy Mother's Day sentiments using
Silhouette Studio Designer Edition V3 and Cameo 1.
Here's now my Thank You Card in Z Fold
design technique.
I really like making a Z fold design card
because of 3D effect in the middle of the card and the uniqueness of this. This Thank You card is 6 x 4.25 inches when fold. The envelope I use the 6 ½ x 4 ¾ inches.
A friend of mine saw these cute paper girls on my Facebook timeline and the Double Z Fold card on my Facebook page. She message me if I can
incorporate the cute girl and z fold card for her thank you card baby shower on June. It is my honor to make a card for her and be part of her baby shower preparations.
So, what I did is I sketch on the drawing pad the design of her thank you
card and made a draft out of it. I also check the size of
the envelope for this. The size of the envelop is the first thing I took considerations in making a card.
I
use the Silhouette Studio Designer Edition V3 to make my own pattern paper, chili pepper and Thank you sentiment strip. And use Silhouette Studio and Silhouette
Cameo for cutting these objects or files and also balloons.
I told my friend that I will add teddy bear and I ask her if she wants something. She replied for the chili pepper. Because the name of the baby girl will be Pepper.
These teddy bears and chili peppers are 3 inches wide and 2 inches height only. I make sure that the is not over size on the card. The teddy bear is from Google. You noticed that there's a fold on both ends because I glue these fold or these part to the Thank You sentiments. I think these folds are the "system" they are referring to.
I like the design of my Thank You sentiment. It is inspired from Google. It has a curve broken line with different colors small heart. This 8 inches long. I fold it half and fold it half again. The folds are for the system. I glue first the last section of this strip to the card base and glue the first section to the card base. I also glue the teddy bear and chili pepper inside of it.
Please watch this video how I attached the long strips which is the Thank You sentiments and the short strips the chili pepper and teddy bear to the card base very easy.
I
use Bigkick, Sizzix to cut the parts of the girls. Remember this,
the metal dies are not from Sizzix so when cutting the parts of the
girl dies you will use all the tabs of the multipurpose platform.
You can see my how to cut this girl metal dies by
watching this video via Youtube
The video below is the same technique when doing this Thank You card. The difference are I have balloons, teddy bear and chili pepper. And also on how I attached the system to the card, teddy bear and chili pepper.
The YouTube video below are some of the
things I did in making this Thank You Double Z fold Card. I did this video via YouTube live stream. Please watch!
1. How I add and print my trademark for my
card?
2. How I match the color of the bows and
belt to the dress of the girl?
The card stocks that I use are
Neenah card stock 8.5" x 11 , Bright white, smooth, 65 lb for background and offset balloons
Canvas Texture Premium Card stock 8.5 x 11, Snowcap for the background prints, teddy bears, chili peppers and thank you strips
Nana's Nursery Baby Girl DCWV and Recollection solid card stocks for the parts of the girls
Paper and More for the pink balloons, All About Boys and Mambi Sheets Me and My Big Ideas for balloons
For sure, this thank you card with girl and balloons can match to you party. I can replace the teddy bear and chili pepper on your like. Oh! We can use this also for birthday invitations! If you like this please email me here or at dethsgreetings@yahoo.com
Hi Magandang umaga! In this video, I am showing how to add trademark at the back of your card using Silhouette Studio Designer Edition. I use Neenah white cardstock 65 lbs 8.5 by 6 inches. I use Staple Duotrim to cut or trim the cardstock. Before I print it on my background card I test the printing using different paper so that I will not waste my cardstock. After I add the text or trademark on my layout I print it. I use Epson ET 2500 printer to print my trademark. Please watch the video above for complete procedure! Thank you
I made another Z Fold cards for mother's day and sympathy cards. 2 for mother's day and 1 for sympathy card. Last week, I made 5 Z fold cards for mother's day only and I mailed the cards to my mother-in-law, tita and friends. The background cardstock is from Staple and it is 8 ½ wide by 5 ½ tall. When fold it is 4 ¼ by 5 ½. I use the 6 ½ x ¾ envelope. I use my trimmer to cut it into 2. Then after I cut it I fold in half and fold again the top of the card. Or you can score it to 2 1/8 and score it to 4 1/4. And fold it.
The green vine flowers are from Vintage
Flower Metal Cirrus Flower Cutting Dies Stencils from
China, AliExpress
The top print is from Fresh Floral Stack of DCWV 180 sheets that I bought in Acmoore. I use
the Silhouette Studio Designer Edition and Silhouette Cameo to cut
these. I draw a rectangular shape 8 ½ wide by 5 ½ height as
background and divide this shape into 2 to get perfect size of each
side. Then on the other side I divide it into 2. After this, I use
the offset command to get perfect size inside of the background.
I use again the Silhouette Studio
designer edition to design the sentiments. I used 4 different fonts
in my Sending Love and Sympathy sentiment. Sending is Cherryla, Love
is mighty heart, and aquarelle and sympathy is Edwardian Script ITC
I cut 3 lace border strips that is 8 ½ long and 1 inch thick. I use
the Martha
Stewart Doily Lace Edge Punch to punch the border. The cardstock is also from Staples. Then for the insert strips I cut 2 pcs for each cards.
The size is 2 ½ long. Then fold at least a quarter on each sides.
On
my first attempt I glue 2 ½ strips to the 8 ½ strip before I attached the strip to the card if it is easy to glue. But for me not. This
Cgull tweezers is very useful. Aside of holding the small pieces I use
this to clip my projects. Please click the my Youtube video on how I made Z fold cards Mother's day and Sympathy cards


